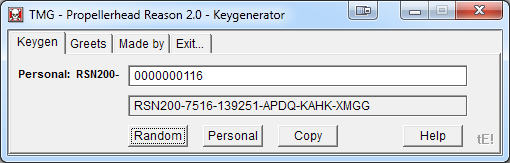
If you've ever downloaded a program illegally before, you'll almost definitely be aware of the culture surrounding the design of key generators and/or cracks. These programs typically have one window and at least one button to generate a key, with another allowing you to quit. They may also have a text entry box to enter your registration details and generate something from that. More advanced keygens typically have music and a graphical demo of some sort included in them.
Here's how you can make your very own with Python 3 (any version) and a few included standard libraries. From there you can make your keygen as complex as you want. Note that this article doesn't cover the art of disassembly and the discovery of the mechanisms like that. Such a topic is covered elsewhere and is beyond the scope of this.
First of all, you'll need a version of Python 3 which you can either download from the site or install with your package manager. From there, you can make a very basic keygen using what's included in the standard library. For our graphical display, we'll use Tkinter
import tkinter
import string
import random
Let's start by importing these modules from the standard library. Tkinter is necessary for making things show up on screen, and the rest are for generating our keys
root = tkinter.Tk()
root.title("My Amazing Keygen")
root.resizable(False,False)
root.geometry("300x100")

root.mainloop()
Underneath our imports we type out what we need to get our GUI working. This first off instantiates Tkinter and sets our window title and makes sure it can't be resized. The size is also set manually to 300x100 pixels. We can come back and change all of this later on in case we decide to add more things. The root.mainloop() line is what allows everything to run. If you try running this now you should see an empty window with nothing on it.
boxtext = tkinter.StringVar()

textlabel = tkinter.Label(text="Your key:").place(x = 10, y = 10)
textbox = tkinter.Entry(root, width = 30, textvariable = boxtext).place(x = 10, y = 35)
button = tkinter.Button(root, text="Generate key", command = generate).place(x = 10, y = 65)
This gives us our variable that displays the key itself in the box. We have three widgets in the form of a text label, a text box, and a button. They're all put into place with exact co-ordinates, and belong to our root widget. The text box is given the proper text variable, and the button runs a function called "generate" when pressed but we'll get to those later. Make sure this is above your root.mainloop() line and upon starting you should see the widgets.
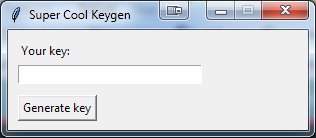
This is what you should have so far. By the end, we'll be able to push the button and have our key show up in the box. First of all, to do that, we'll need a function named generate that we place just below our imports.
def generate():
    thekey = ''.join(random.sample(string.ascii_letters, 24))
    texttext.set(thekey)
Now when you press the button, the text in the textbox should change to be our generated key which is just a random assortment of letters in this case. For an actual program it wouldn't be a very good mechanism but for our purposes it works fine. This is our working keygen! From here you can try other stuff such as changing around the key generation mechanism, maybe using Base64 or your own algorithm.
import tkinter
#from tkinter import messagebox
import string
import random

def generate():
    thekey = ''.join(random.sample(string.ascii_letters, 24))
    texttext.set(thekey)

root = tkinter.Tk()
#Set the window title
root.title("Super Cool Keygen")
root.resizable(False,False)
#Set the dimensions here
root.geometry("300x100")

#Variables
texttext = tkinter.StringVar()

#Outline our widgets
textlabel = tkinter.Label(text="Your key:").place(x = 10, y= 10)
textbox = tkinter.Entry(root, width = 30, state="normal", textvariable=texttext).place(x = 10, y = 35)
button = tkinter.Button(root, text="Generate key", command = generate).place(x = 10, y = 65)

root.mainloop()
This is our code so far which works well enough. There are a ton of additions we can make, however. Let's try some of those out. Something simple we can do is to have our button also copy the key to the clipboard when we press it. To do that, we'll install pyperclip and in our key generator function we'll add
pyperclip.copy(thekey)for ease of use.
So far we've barely scratched the surface. We now need to add some music! First of all download MilkyTracker from the download page along with the Woolys sample pack. Inside that sample pack are a variety of nice-sounding samples from various sources. In MilkyTracker, drag one of the sample WAV files into the samples box. In my case I used the supadoh SID samples. By default they won't make any sound so press the "Smp Ed" button to bring up the sample editor. If you're functionally braindead, feel free to skip all of this and download a random file from The Mod Archive
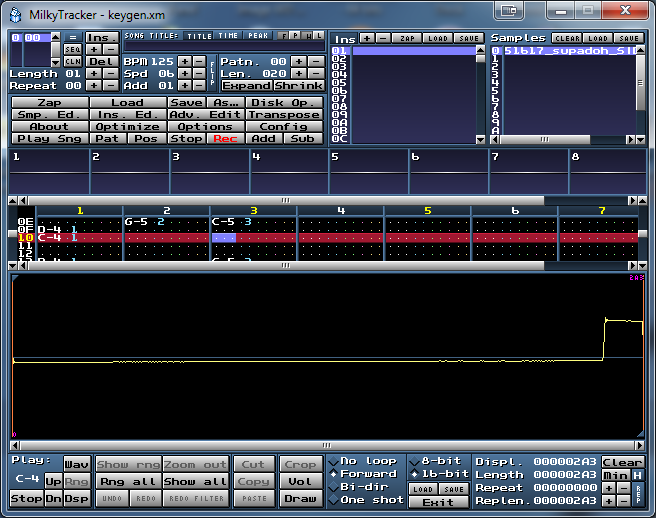
In here, press the "Forward" button and then try holding down keys on your computer's keyboard. A sound should be emitted. Now press the sample editor button again to go back to the main page. From here, press space to go into recording mode and then press random keys on your keyboard. You should see the pattern go downwards. When you feel like you've gotten bored, press space again and then press play again and listen to the monstrosity you've created.
Once you've done this, press the "save" button and save it as "keygen.xm" in the same location as your keygen.py file so that it may be easily accessed.
Back in your text editor, we're now going to have to init the necessary audio crap in order to play your keygen tune. To do this we're going to have to install Pygame through pip or something, as unfortunately we don't have the luxury of UFmod. From here, add the following lines right under the existing imports to have your xm file play when the keygen is loaded
from pygame import mixer

mixer.get_init()
mixer.init()
mixer.music.load("keygen.xm")
mixer.music.play()
Upon starting up, you should be able to hear your tune play out of your speakers. This is arguably the most important feature to implement, as many keygens become memorable due to their audio alone. From here, there's many other things you can attempt. The main one is a graphical demo of some sort. You may want to use Tkinter's canvas widget to do that, or look into something such as PyOpenGLTk which will allow you to implement a shader. Unfortunately I can't be bothered to write about that right now. Maybe another time.